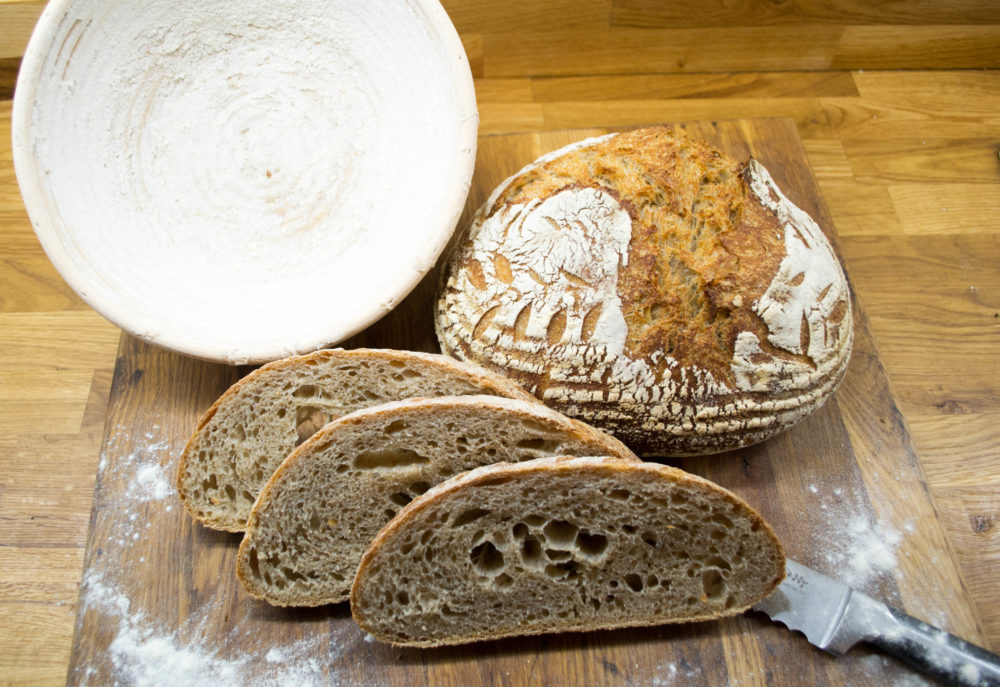
Making sour dough is a labour of love. It may be days between starting and finishing, but it is well worth the wait. For some people, making sour dough is almost a meditative process. You need to keep the starter alive between batches, feeding it and checking to see how quickly it is growing, putting it in the fridge, taking it out, and then finally extracting some to make into delicious bread. So prepare yourself, this recipe does take time but it is tried and tested and the best of the different ones we have tried. This is a modified version of Sarah Owen’s wonderful sourdough recipe.
Makes 2 loaves
Ingredients:
200g starter (100% hydration) – To achieve 100% hydration add equal amounts water and flour when feeding the starter. I like to use the lovely Talgarth Mill Rye flour for my starter. I feed my starter the day before I want to use it to make sure it is nice and lively.
700g organic strong white flour
700ml warm water
20g salt mixed with 50ml of water
Method:
1. Feed the starter 24 hours before beginning the bread, it should be light and bubbly when you come to make your loaf but not yet have a layer of water on the surface. Between loaves you can slow its fermentation by placing it in the fridge.
2. Add the water to the starter in a large mixing bowl and stir thoroughly. Then add the flour and mix with your hands until there is no dry flour remaining. Leave for 10-15 minutes before adding the salt and water. At this stage the dough should be sticky, add a little more water if it needs loosening.
3. For the next 4 to 8 hours you will need to gently fold the dough from the edge of the bowl to the centre every 45 minutes, it sounds a lot but each fold session only takes a minute or so. Push your hand under the side of the dough to detach it from the bowl, stretch it over the top and press the fold down to remove any large air pockets. Work your way around the bowl until it has all been folded in. Try a little water on your hands to stop the dough sticking to you. Cover the bowl with a tea towel between folds. You should see the dough develop and become stretchy with a smoother skin as the folds progress. 18-23 ºC is the best temperature for this step, if it’s a little cooler just extend the period.
4. Once the 8 hours are up, remove the dough from the bowl gently, to avoid pushing the air out of it, and place on a floured surface. I use a wet silicon bowl scraper and run it around the edge to detach the dough as I tip it out. Gently stretch and fold the dough to the centre on four sides, then repeat for the four corners sticking out, so it’s roughly round. Carefully turn it over and tuck the sides under, again gently, to round it further. Leave it for 30 minutes.
5. Turn it back over and this time pull and fold inwards, working from one end of the dough to the other and overlapping the folds so you end up with a plait like appearance to the folds. Now, from one end, roll the dough towards you, working on building tension across the top by folding tightly. This process is to build up surface tension on the dough which stops the dough spreading out when you put it on the baking tray later. You should now have a smooth surface facing up, slightly elongated. Tuck the ends under to round it off if your Banneton is a bowl shape or leave elongated if it’s more loaf shaped. Turn it back over so you have the folded side up and gently lift it into your floured Banneton, cover with a tea towel and leave for up to 24 hours (minimum 10) in the fridge for the final fermentation. If you don’t have a Banneton you can use a bowl lined with a floured linen cloth.
6. Time to bake. By now the dough should have risen considerably, ideally with signs of bubbles pushing at the surface of the dough. If you don’t have the bubbles fear not, try leaving it another couple of hours or just go ahead and bake, I’ve one this a few times and it still works out great. Preheat the oven to 200 degrees (fan assisted) and take the dough out of the fridge to let it warm up a bit. To bake I like to put the dough onto a baking tray which has a reusable silicon baking sheet on it. Carefully turn the dough out of the proving bowl onto the baking sheet, with the smooth side up, dust with flour if not already floury and score the dough across the top using a very sharp knife, being careful not to push the air out of the dough. Place a large, upturned casserole bowl over the top of the dough. Make sure there’s enough space for the dough to expand. After 20 minutes of baking take the casserole bowl off and bake for an additional 15-20 minutes for the crust to darken and crisp up. Take out and let to cool for at least an hour before cutting.
7. Enjoy your delicious creation and let the sourdough addiction commence.


It’s just gone in the fridge. Fingers crossed for tomorrow evening!
We shall await the outcome with baited breath! 😉